AWS CI/CD Pipeline Automate Deployments with CodePipeline, CodeBuild & S3 | Step-by-Step Guide
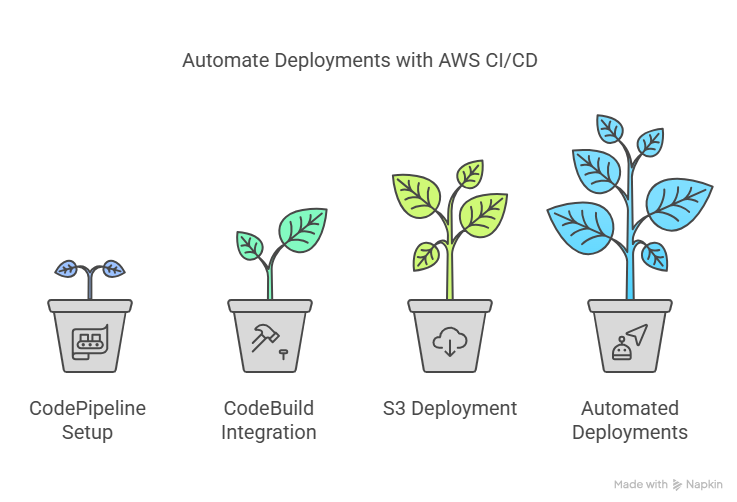
AWS CI/CD Pipeline Automate Deployments: Learn how to build a complete end-to-end CI/CD pipeline on AWS from scratch. This step-by-step guide uses CodeCommit, CodeBuild, CodePipeline, and S3 to automate static website deployment. Includes sample code and advanced concepts.
End-to-End Project Guide (Scratch to Advanced)
This guide follows the tutorial’s structure but adds detail and context.
Phase 1: Setup Prerequisites (Scratch)
AWS Account: You need an active AWS account. Free Tier is sufficient for this tutorial initially, but be mindful of potential costs if you exceed limits or leave resources running.
IAM User: Create an IAM user with administrative privileges (or at least permissions for CodeCommit, CodeBuild, CodePipeline, S3, and IAM itself). Best Practice: Avoid using the root user for everyday tasks. Configure programmatic access (access key ID and secret access key) and AWS Management Console access.
AWS Region: Choose an AWS Region where all the services (CodeCommit, CodeBuild, CodePipeline, S3) are available (e.g., us-east-1, eu-west-1). Be consistent throughout the setup.
Git: Install Git on your local machine to interact with CodeCommit. (https://git-scm.com/downloads)
AWS CLI (Optional but Recommended): Install and configure the AWS Command Line Interface. This is useful for interacting with AWS services, especially for configuring Git credentials for CodeCommit.
Installation: https://aws.amazon.com/cli/
Configuration: Run aws configure and enter your IAM user’s access key ID, secret access key, default region, and default output format (e.g., json).
Git Credentials for CodeCommit: Configure Git to use HTTPS or SSH for connecting to CodeCommit.
HTTPS (Recommended for simplicity): Use the Git credentials helper built into the AWS CLI or generate HTTPS Git credentials in the IAM console under your user’s “Security credentials” tab.
SSH: Upload your SSH public key to your IAM user’s “Security credentials” tab and configure your local SSH settings.
Phase 2: Source Code Repository (CodeCommit)
Create CodeCommit Repository:
Go to the AWS Management Console -> CodeCommit.
Click “Create repository”.
Enter a repository name (e.g., my-static-website-repo).
Add a description (optional).
Click “Create”.
Clone the Repository: Repository URL
On the repository page, click “Clone URL” and choose HTTPS or SSH.
Open your local terminal or command prompt.
Navigate to where you want to store the project.
Run: git clone <your-repository-url> (e.g., git clone https://git-codecommit.us-east-1.amazonaws.com/v1/repos/my-static-website-repo)
Create Sample Application Files:
Navigate into the cloned repository directory: cd my-static-website-repo
Create the following files:
index.html (Your main website page)
error.html (Optional: Page shown for errors if using S3 website hosting features)
buildspec.yml (Instructions for CodeBuild)
Phase 3: Sample Application & Build Specification (Source Code)
Here is the complete source code needed for this specific tutorial:
1. index.html
<!DOCTYPE html>
<html>
<head>
    <title>My Static Website V1</title>
    <style>
        body { font-family: sans-serif; background-color: #f0f0f0; color: #333; text-align: center; padding-top: 50px; }
        h1 { color: #007bff; }
        p { font-size: 1.1em; }
        .version { font-size: 0.8em; color: #888; margin-top: 30px; }
    </style>
</head>
<body>
    <h1>Welcome to My Awesome Static Website!</h1>
    <p>This website is automatically deployed via AWS CodePipeline.</p>
    <p>Version: 1.0.0</p>
    <div class="version">Pipeline Triggered!</div>
</body>
</html>
2. error.html (Optional, but good practice for S3 static hosting)
<!DOCTYPE html>
<html>
<head>
    <title>Oops! Page Not Found</title>
    <style>
        body { font-family: sans-serif; background-color: #f8d7da; color: #721c24; text-align: center; padding-top: 50px; }
        h1 { color: #dc3545; }
    </style>
</head>
<body>
    <h1>Error 404 - Page Not Found</h1>
    <p>Sorry, the page you were looking for could not be found.</p>
    <p><a href="/">Return to Homepage</a></p>
</body>
</html>
3. buildspec.yml (Instructions for AWS CodeBuild)
version: 0.2

phases:
  install:
    runtime-versions:
      nodejs: 18  # Example: Specify runtime if needed for build tools, even if just copying files
    commands:
      - echo "Installing dependencies (if any)... Not needed for simple copy."
      # Example: If you had npm dependencies: npm install
  pre_build:
    commands:
      - echo "Running pre-build commands (e.g., linting, tests)..."
      # Example: npm run lint
      # Example: npm run test
  build:
    commands:
      - echo "Build started on `date`"
      - echo "No build steps needed for static HTML, just packaging artifacts..."
      # Example: If you used a static site generator: npm run build
  post_build:
    commands:
      - echo "Build completed on `date`"
      # Example: Run any cleanup or reporting tasks

artifacts:
  files:
    # List all files and directories to be included in the build output artifact
    - 'index.html'
    - 'error.html'
    # Add other assets like CSS, JS, images if you have them:
    # - 'css/**/*'
    # - 'js/**/*'
    # - 'images/**/*'
  # base-directory: 'dist' # Optional: If your build process puts files in a subdirectory (e.g., 'dist' or 'build')
  discard-paths: no # Keep the paths relative to the root
4. Commit and Push Initial Code:
In your local terminal (inside the repository folder):
git add .
git commit -m "Initial commit with index.html, error.html, and buildspec.yml"
git push origin main # Or your default branch name (e.g., master)
Phase 4: Deployment Target (S3 Bucket for Static Website)
Create S3 Bucket for Website:
Go to the AWS Management Console -> S3.
Click “Create bucket”.
Enter a globally unique bucket name (e.g., my-static-website-yourname-123).
Choose your AWS Region (same as before).
Block Public Access settings: Uncheck “Block all public access”. You must allow public access for a website. Acknowledge the warning. Important: This makes your bucket contents public. For production, use CloudFront instead for better security and performance.
Keep other settings default and click “Create bucket”.
Enable Static Website Hosting:
Go into the bucket you just created.
Click the “Properties” tab.
Scroll down to “Static website hosting” and click “Edit”.
Select “Enable”.
Hosting type: “Host a static website”.
Index document: index.html
Error document: error.html (optional)
Click “Save changes”.
Note the Bucket website endpoint URL provided. This is how you’ll access your site.
Add Bucket Policy for Public Access:
Go to the “Permissions” tab of your bucket.
Scroll down to “Bucket policy” and click “Edit”.
Paste the following policy, replacing YOUR_BUCKET_NAME with your actual bucket name:
{
    "Version": "2012-10-17",
    "Statement": [
        {
            "Sid": "PublicReadGetObject",
            "Effect": "Allow",
            "Principal": "*",
            "Action": "s3:GetObject",
            "Resource": "arn:aws:s3:::YOUR_BUCKET_NAME/*"
        }
    ]
}
Click “Save changes”.
Phase 5: Build Process (CodeBuild)
Create S3 Bucket for Build Artifacts: (Separate from the website bucket)
Create another S3 bucket (e.g., my-codepipeline-artifacts-yourname-123) in the same region.
Keep “Block all public access” checked for this bucket. It doesn’t need to be public.
Create CodeBuild Project:
Go to the AWS Management Console -> CodeBuild.
Click “Create build project”.
Project name: my-static-website-build
Source:
Source provider: AWS CodeCommit
Repository: Select the my-static-website-repo you created.
Reference type: Branch
Branch: main (or your default branch)
Environment:
Environment image: Managed image
Operating system: Amazon Linux 2 (or Ubuntu)
Runtime(s): Standard
Image: Choose a recent standard image (e.g., aws/codebuild/amazonlinux2-x86_64-standard:5.0). The runtime specified inside the image doesn’t strictly matter for just copying HTML, but it’s good practice.
Image version: Always use the latest image…
Environment type: Linux
Buildspec:
Buildspec name: buildspec.yml (Leave blank if the file is named buildspec.yml in the root of your repo, otherwise specify the path).
Artifacts:
Type: Amazon S3
Bucket name: Select the artifact bucket you created (e.g., my-codepipeline-artifacts-yourname-123).
Name: (Optional) A folder name within the bucket for artifacts (e.g., website-build.zip). If blank, output goes to the root.
Artifact packaging: Zip (CodePipeline usually expects a zip).
Logs (Optional but Recommended): Enable CloudWatch logs for debugging.
Service Role:
Select “New service role”. AWS will create a role with necessary permissions (like accessing CodeCommit, writing artifacts to S3, writing logs). Note the role name (e.g., codebuild-my-static-website-build-service-role).
Click “Create build project”.
Phase 6: Orchestration (CodePipeline)
Create Pipeline:
Go to the AWS Management Console -> CodePipeline.
Click “Create pipeline”.
Pipeline name: my-static-website-pipeline
Service role: Select “New service role”. AWS will create one (e.g., AWSCodePipelineServiceRole-us-east-1-my-static-website-pipeline). Allow it to create the role.
Artifact store:
Select “Custom location”.
Bucket: Choose the artifact bucket you created (e.g., my-codepipeline-artifacts-yourname-123).
Click “Next”.
Add Source Stage:
Source provider: AWS CodeCommit
Repository name: Select my-static-website-repo.
Branch name: main (or your default branch).
Change detection options: AWS CodePipeline (recommended over CloudWatch Events for simpler setup).
Output artifact format: CodePipeline default.
Click “Next”.
Add Build Stage:
Build provider: AWS CodeBuild
Region: Ensure it’s your chosen region.
Project name: Select my-static-website-build.
Build type: Single build.
Click “Next”.
Add Deploy Stage:
Deploy provider: Amazon S3
Region: Ensure it’s your chosen region.
Bucket: Select the website bucket (e.g., my-static-website-yourname-123).
Extract file before deploy: Check this box. This tells CodePipeline to unzip the artifact from CodeBuild before copying files to the S3 bucket.
Deployment path: (Optional) If you want to deploy into a subdirectory within the bucket, enter it here. Leave blank for the root.
Click “Next”.
Review and Create:
Review all the settings.
Click “Create pipeline”.
Phase 7: Testing the Pipeline
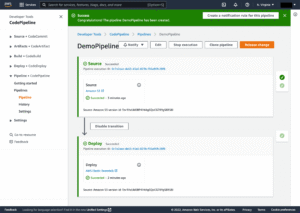
Initial Run: The pipeline might start automatically after creation. You can watch its progress in the CodePipeline console. It should fetch from CodeCommit, run CodeBuild, and deploy to S3.
Verify Deployment: Once the pipeline succeeds, go to the Bucket website endpoint URL you noted from the S3 static website hosting configuration. You should see your index.html page.
Trigger a Change:
Open index.html locally in your text editor.
Change the version number or add some text (e.g., change <p>Version: 1.0.0</p> to <p>Version: 1.0.1 – Updated!</p>).
Save the file.
In your terminal (inside the repo folder):
git add index.html
git commit -m "Updated index.html to v1.0.1"
git push origin main
Observe Automation: Go back to the CodePipeline console. Within a minute or two, the pipeline should automatically detect the push, trigger a new execution, and run through the Source, Build, and Deploy stages again.
Verify Update: Once the pipeline succeeds again, refresh your website URL in the browser. You should see the updated content.
Phase 8: Advanced Concepts & Next Steps
This is where you go beyond the basic tutorial:
Different Deployment Targets:
EC2: Use CodeDeploy agent installed on EC2 instances. Requires an appspec.yml file in your repo defining deployment lifecycle hooks (scripts to run). CodeBuild would produce an application package, and CodeDeploy would deploy it to specified instances (often managed via Auto Scaling Groups or Tagging).
Elastic Beanstalk: Add a deploy stage targeting an Elastic Beanstalk environment. CodeBuild produces a source bundle compatible with Beanstalk.
ECS/Fargate: Build a Docker image in CodeBuild, push it to ECR (Elastic Container Registry), and then use a CodeDeploy action (or a CloudFormation deployment action) to update the ECS Service/Task Definition to use the new image.
AWS Lambda: Package your function code (and dependencies) in CodeBuild, and use a CodeDeploy action (or CloudFormation/SAM) to deploy the new Lambda function version/alias.
Manual Approval Stage: Add a “Manual approval” action in CodePipeline (e.g., before the Deploy stage) to require human confirmation before proceeding. Often uses SNS for notifications.
More Sophisticated Testing:
Unit Tests: Run unit tests within the build phase of your buildspec.yml. Fail the build if tests fail (npm test or similar).
Integration Tests: Add a separate “Test” stage in CodePipeline after deployment to a staging environment. Use CodeBuild (or other tools like Lambda functions) to run tests against the live staging environment.
Notifications: Configure CodePipeline to send notifications (e.g., success, failure, approval needed) to an SNS topic, which can then trigger emails, Slack messages, etc.
Infrastructure as Code (IaC): Define all the resources (CodeCommit repo, S3 buckets, CodeBuild project, CodePipeline, IAM roles/policies) using CloudFormation, AWS CDK, or Terraform. This makes the setup repeatable, version-controlled, and easier to manage. This is a best practice for any serious deployment.
Security Enhancements:
IAM Granularity: Refine the IAM roles created automatically to follow the principle of least privilege.
Secrets Management: Use AWS Secrets Manager or Systems Manager Parameter Store to handle sensitive information (API keys, database passwords) needed during build or deployment, instead of hardcoding them.
S3 Security: Use CloudFront in front of your S3 website bucket. This allows you to keep the bucket private while serving content securely via HTTPS, leveraging AWS’s CDN for better performance and DDoS protection.
Monitoring: Use CloudWatch Metrics and Alarms to monitor pipeline health, build durations, deployment failures, etc.
Deployment Strategies: For EC2/ECS/Lambda deployments, implement strategies like Blue/Green or Canary deployments using CodeDeploy features to minimize downtime and risk.
Cross-Region/Cross-Account Deployments: Configure CodePipeline and CodeDeploy for more complex scenarios involving multiple AWS regions or accounts.
Cleanup:
Crucial: To avoid ongoing charges, delete the resources you created:
CodePipeline pipeline
CodeBuild project
CloudFormation stack (if you used IaC)
S3 buckets (empty them first)
CodeCommit repository
IAM roles created for CodeBuild and CodePipeline (if not needed elsewhere)
CloudWatch Log groups associated with CodeBuild

Congratulations! You have successfully completed setup a AWS CI/CD Pipeline Automate Deployments with CodePipeline, CodeBuild & S3.
For more information about this project please visit [su_button url=”https://aws.amazon.com/getting-started/hands-on/continuous-deployment-pipeline/” background=”#ef312d” size=”10″]Set Up a Continuous Deployment Pipeline Using AWS CodePipeline[/su_button]
For more information about Job Notifications, Open source Projects, Tech updates and Interview questions, please stay tuned TechCareerHubs official website.