Custom Ubuntu ISO 2025: Build, Transfer & Boot from USB
In this step-by-step guide, learn how to build a Custom Ubuntu ISO 2025 image, transfer it from a Linux terminal to a Windows system, and boot it from a USB drive. Full system requirements and commands included. Creating a custom Ubuntu ISO lets you bundle your favorite apps, preconfigure settings, and distribute your own version of Ubuntu — whether it’s for personal use, enterprise deployment, or educational purposes.
In this article, I’ll Walk you through:
– Building a **custom Ubuntu ISO**
– Transferring the ISO to a **Windows system via terminal**
– **Flashing it to a USB drive**
– **Booting it on any computer**
System Requirements:-
Before we begin, make sure you have:
| Component | Minimum Requirement |
|——————–|———————————————|
| 🐧 Linux Host | Ubuntu 20.04+, Debian-based (for building ISO) |
| 💾 Disk Space | At least 10 GB free |
| 🧠 RAM | 4 GB minimum |
| 🔌 Internet | Required for package downloads |
| 💽 USB Drive | 4 GB+ formatted (for flashing ISO) |
| 🪟 Windows PC | For testing USB boot & downloading ISO |
—
Part 1: Create a Custom Ubuntu ISO on Linux
Step 1: Install Required Packages
sudo apt update
sudo apt install debootstrap squashfs-tools xorriso grub-pc-bin grub-efi-amd64-bin mtools
Step 2: Setup Working Directories
mkdir -p ~/ubuntu-custom/{chroot,iso/{casper,boot/grub}}
cd ~/ubuntu-custom
Step 3: Bootstrap a Minimal Ubuntu System
sudo debootstrap –arch=amd64 focal chroot http://archive.ubuntu.com/ubuntu/
# Replace focal with jammy or noble if you want newer Ubuntu versions.
Step 4: Chroot Into the Custom System
sudo mount –bind /dev chroot/dev
sudo chroot chroot
Inside chroot:
mount -t proc proc /proc
mount -t sysfs sys /sys
mount -t devpts devpts /dev/pts
Step 5: Customize Ubuntu Environment (Wallpaper, Themes, Scripts)
Install packages, add users, or modify configuration:
apt update
apt install ubuntu-standard gnome-shell firefox vim curl
adduser myuser
Set a Default Wallpaper: Replace or add your desired wallpaper image
mkdir -p /usr/share/backgrounds
cp /path/to/your-wallpaper.jpg /usr/share/backgrounds/custom-wallpaper.jpg
Add your script:
cat <<‘EOF’ > /usr/local/bin/startup-script.sh
#!/bin/bash
notify-send “Welcome to Custom Ubuntu!”
# You can start services, launch apps, etc.
EOFchmod +x /usr/local/bin/startup-script.sh
Configure GTK Themes and Icons (Optional): Install and set a custom GTK theme
apt install yaru-theme-gtk yaru-theme-icon gnome-tweaks -y
cp -r /path/to/CustomTheme /usr/share/themes/
cp -r /path/to/CustomIcons /usr/share/icons/
Set them via gsettings
gsettings set org.gnome.desktop.interface gtk-theme “CustomTheme”
gsettings set org.gnome.desktop.interface icon-theme “CustomIcons”
Step 6: Exit and Clean Up Chroot
exit
sudo umount chroot/dev/pts
sudo umount chroot/dev
sudo umount chroot/proc
sudo umount chroot/sys
Step 7: Package Filesystem for Live Boot
sudo mksquashfs chroot iso/casper/filesystem.squashfs -e boot
sudo cp chroot/boot/vmlinuz-* iso/casper/vmlinuz
sudo cp chroot/boot/initrd.img-* iso/casper/initrd
Step 8: Create Manifest and Boot Config
chroot chroot dpkg-query -W –showformat=’${Package} ${Version}\n’ | sudo tee iso/casper/filesystem.manifest
sudo cp iso/casper/filesystem.manifest iso/casper/filesystem.manifest-desktop
Then create GRUB menu:
cat <<EOF | sudo tee iso/boot/grub/grub.cfg
set timeout=10
set default=0menuentry “Custom Ubuntu” {
linux /casper/vmlinuz boot=casper quiet splash —
initrd /casper/initrd
}
EOF
Step 9: Build the ISO File
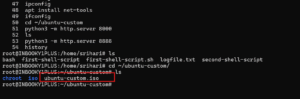
grub-mkrescue -o ubuntu-custom.iso iso
You now have ubuntu-custom.iso
Part 2: Transfer ISO to Windows via Linux Terminal
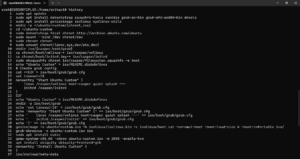
Step 10: Start Python Web Server on Linux
In the terminal, run:
cd ~/ubuntu-custom
python3 -m http.server 8888